Setup Raspberry Pi 5 16GB from scratch
Setup Raspberry Pi5 16 GB, with M.2 HAT+ 256GB SSD Kit, active Cooler with heat sink- and finally install OS on the assembled Pi.
1. OS Setup
- Setup Raspberry Pi OS 64-bit (Bookworm) → best for GPIO/camera + easiest device support.
- Download Raspberry Pi Imager from https://www.raspberrypi.com/software/
- Install it on your computer (Windows, macOS, or Linux)
- Select Raspberry Pi official OS 64-bit, the SD-card to flash, and the actual device bought
- Now edit settings- set hostname(raspberrypi.local), Set username(admin) and password, configure WLAN Wifi name, enable SSH
- Now finally write the image to the SD card- will take a while.
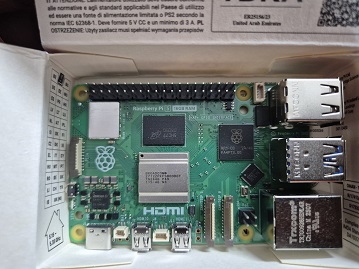
Raspberry Pi 16GB
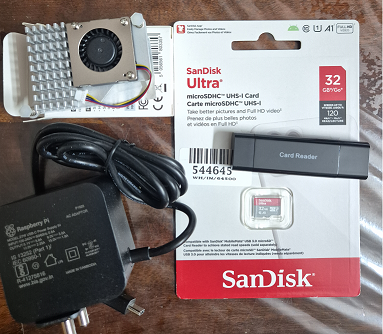
Cooler, microSD card, and 27W official charger
2. Hardware Setup
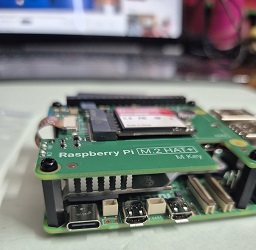
- Join Cooler with the board: Align plastic connectors and stickers to the pi board and hear 2 clicks, then join fan cable to the fan connector on the board.
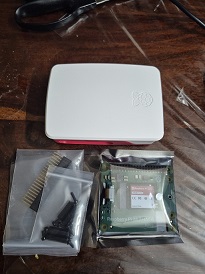
- Attach M2.HAT + NVMe SSD: Storage Solution HAT connects the NVMe drive via PCIe.
- Attach micro-SD card to the bottom of the pi board
Pi and Cooler attached

M.2 HAT+ with 256GB SSD
All components combined:
3. Boot up
- Connect power and wifi network.
- The Pi will boot- the initial setup runs automatically.
- You can now SSH in from your computer: ssh username@hostname.local
- If you set: hostname: pi-lab, username: ujwal, You’d connect like this: ssh ujwal@pi-lab.local.
After 2 hours of debugging, this was the issue: if ur wifi or ssid is on 5ghz, you must change the channel number to 36, reboot the router, and then finally flash your SD with the image.

finally ssh into the pi:

4. Update software
This brings Raspberry Pi OS, firmware, and drivers up to date (especially important for Wi-Fi stability and SSD support).
1
sudo apt update && sudo apt full-upgrade -y
Reboot now, takes 1-2 mins.
1
sudo reboot
Now ssh back into the pi, and boot from the NVMe SSD (faster and more reliable than microSD)
1
sudo raspi-config
Advanced Options → Boot Order → NVMe/USB Boot First Then use the “SD Card Copier” tool (sdcardcopy) to clone your system from the microSD to the NVMe drive. Power off, remove the microSD card, and power back on — it will now boot from the SSD.
5. Copy SD to SSD for boot
Make sure nothing from the NVMe is mounted:
1
2
sudo umount -R /mnt/clone 2>/dev/null || true
lsblk
Wipe leftover signatures from the NVMe:
1
sudo wipefs -a /dev/nvme0n1
Clone SD → NVMe (bit-for-bit):
1
2
sudo dd if=/dev/mmcblk0 of=/dev/nvme0n1 bs=16M status=progress conv=fsync
sudo partprobe /dev/nvme0n1
Grow the root partition to fill the NVMe. Use growpart (simplest), then grow the filesystem:
1
2
sudo apt-get update
sudo apt-get install -y cloud-guest-utils
Expand partition 2 (root) to the end of the disk:
1
sudo growpart /dev/nvme0n1 2
Check/resize the ext4 filesystem:
1
2
sudo e2fsck -f /dev/nvme0n1p2
sudo resize2fs /dev/nvme0n1p2
Boot from NVMe:
1
sudo poweroff
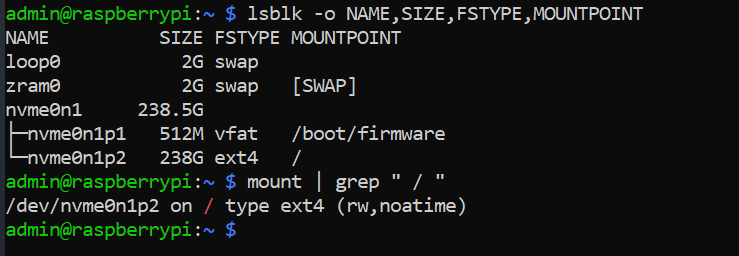
Now remove SD card, power on the PI, it should boot from SSD. Verify after boot:
1
2
lsblk -o NAME,SIZE,FSTYPE,MOUNTPOINT
mount | grep " / "
5. Debugging SSH issues
SSH is sometimes pretty flaky. Here are few things which worked for me.
Ensure ssh is targetting the right ip address. Find the pi’s ip address thru your router: router - network - lan settings - client list. search for client name “raspberrypi”, and then ssh admin@192.168.0.112
Check in above client list that both devices are in the same subnet should be something like this 192.168.0.1/24
If you flashed the image manually, open the boot partition again and look for a file named:wpa_supplicant.conf. If it doesn’t exist or has wrong details, create/fix it: ```bash country=US ctrl_interface=DIR=/var/run/wpa_supplicant GROUP=netdev update_config=1
network={ ssid=”YourWiFiName” psk=”YourWiFiPassword” }
1
2
3
4
5
6
7

* Router usually have 2 band wifis- 2.4ghz and 5ghz(this will have a suffix of _5G post the SSID name). Ensure the laptop ur using to ssh into the pi are in the same wifi band.

* Clear a stale ssh host key if the Pi was reimaged/keys changed
```bash
ssh-keygen -R ip-address-of-pi
ssh-keygen -R raspberrypi.local
- narrow down ssh issues using verbose logs
1
ssh -vvv admin@<pi-ip>